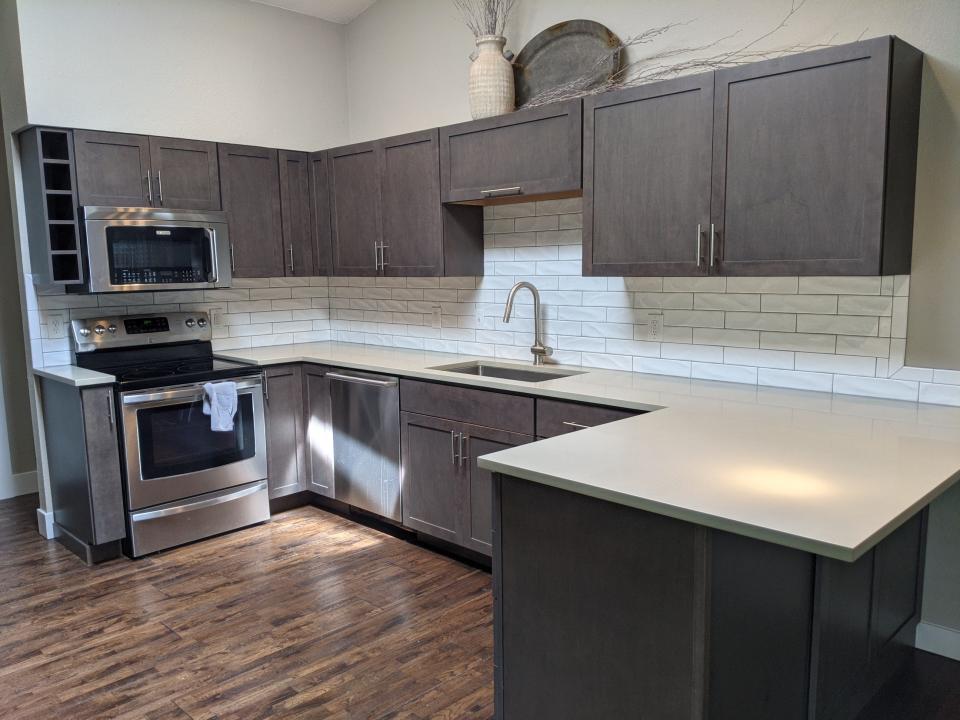
DIY backsplash makes a big impact on a tight budget
As you might expect, the kitchen remains one of the most expensive rooms to remodel. And no wonder: Between cabinets, countertops and contractors, revamping the heart of the home can be a budget-buster. But there are tasks you can perform yourself to save some cash.
With some basic tools and materials, installing a new backsplash can give a tired kitchen new life on a wallet-friendly budget, and it’s an upgrade that most novice DIYers can pull off over a weekend.
Two experts walk you through the project from start to finish, but if you need additional help, you can turn to the pros at home improvement stores like Home Depot and Lowe’s, which offer online DIY tutorials and webcasts on numerous projects that will give you the know-how and checklist of supplies to get started. Although both chains have long offered in-store workshops, these offerings might be limited or unavailable due to pandemic restrictions.
Getting started
From materials like porcelain and ceramic to patterns like penny rounds and subway tile, choosing the backsplash can feel more daunting than installing it. “Subway tile is classic and timeless,” says interior designer Shaolin Low of Studio Shaolin in Honolulu. “You will never be able to date when it was installed.”
Whether you want it to fade or pop with contrast, the grout color between the tiles is also a big design decision. “I always prefer a 1/16- or 1/8-inch-wide grout line,” Low says. “If you want to play it safe, pick a neutral grout color that blends with your tile.”
Once you select the tile style, order 10 percent more than the square footage of your backsplash to account for cuts and mistakes. Also, be sure to purchase the appropriately sized spacers.
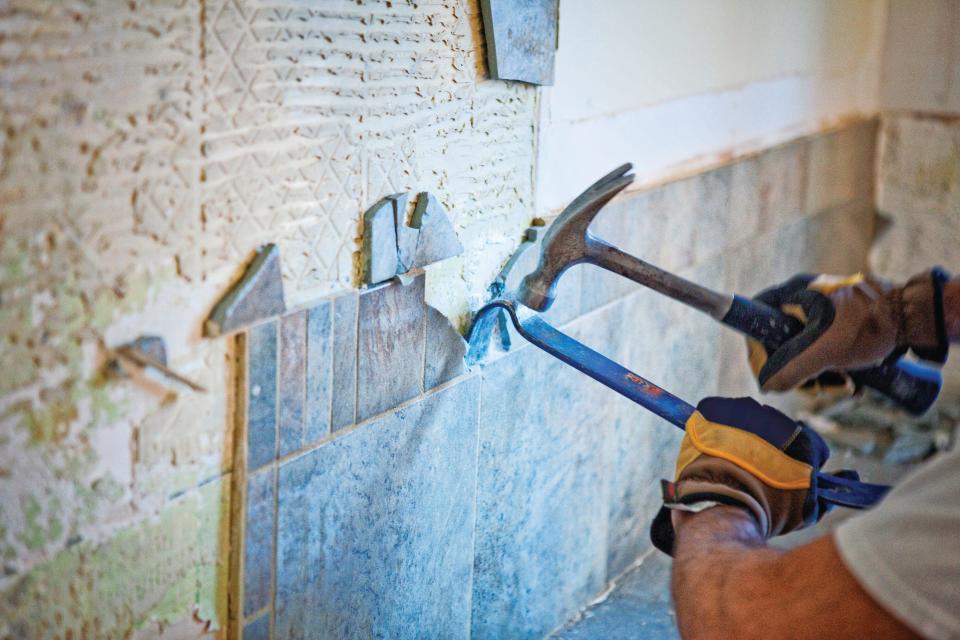
Remove the existing tile
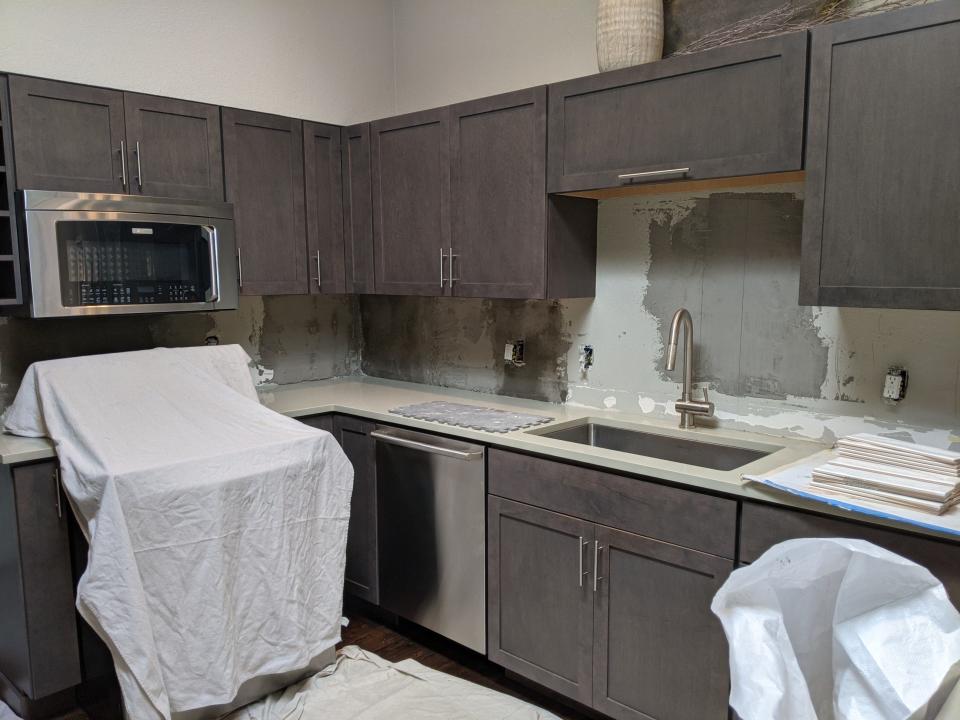
Take off your current backsplash with care because any dings in the drywall behind it will need to get filled with thinset mortar before you can start tiling. Shut off the power to outlets, and remove the cover plates.
Protect the countertop by layering cardboard over a heavy canvas drop cloth.
Starting at the outside edge of the backsplash, gently tap a flat bar with a hammer where the tile meets the drywall. Avoid digging the tool into the drywall. Scrape the area free of any leftover adhesive or thinset with a stiff putty knife. Before you tile, smooth over the drywall with premixed thinset mortar and a trowel, forcing it into any low spots. Allow 30 minutes for it to dry.
Plan the layout
Find the focal point of the backsplash, which is usually behind the sink or the range. “When there’s a focal point, like the stove, usually you want centerline above it, and then you start tiling from that line outwards, hiding your cuts where the backsplash meets any cabinets,” says tile contractor James Upton of Washington-based Tiger Mountain Tile. Strike a line the entire height of the backsplash at the center of the focal point using a pencil and a level.
Now, lay out the tile on the countertop, using the spacers, and measure against the backsplash’s width and height. You’ll see where you’ll be making cuts to fit the pattern on the wall. Try to start with full tiles near the countertop and hide any cuts higher and toward the ends of the walls.
Spread the adhesive
A premixed tub of tile adhesive is easier to work than thinset mortar. Apply the adhesive using a 3/16-inch trowel, working on one side of your layout’s centerline, closest to the countertop.
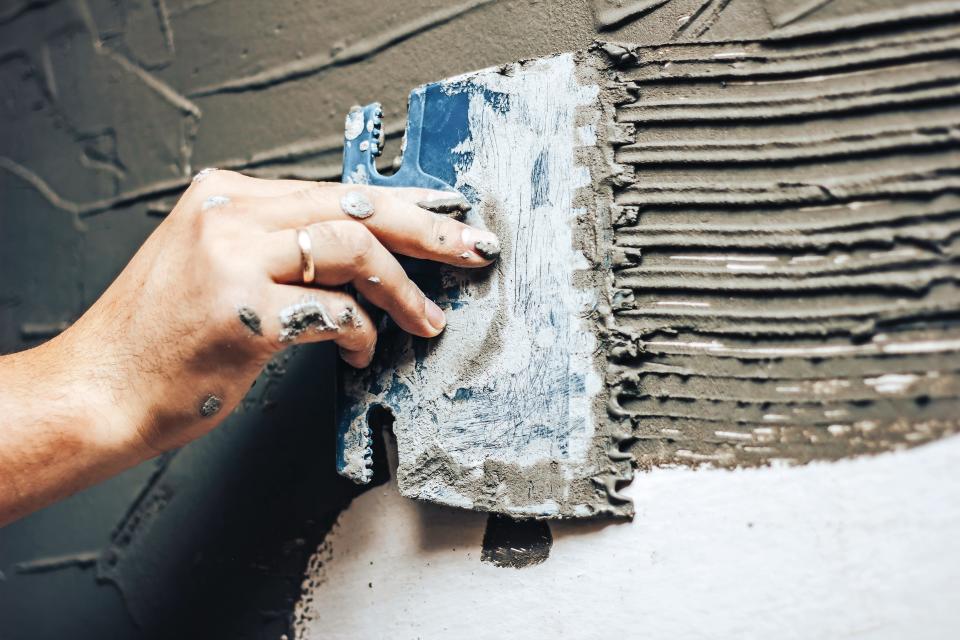
If the tile design spans the centerline, as it does with subway tile, cover only part of the line with adhesive.
“Mastic (adhesive) grabs fast, but it tends to dry quickly, so only spread as much as you can tile over in about 30 to 45 minutes,” says Upton.
Start tiling
Back at the centerline, start laying tiles horizontally just above the countertop, adding spacers below the first row. Continue adding tile with spacers, working from the centerline out to the nearest edge. You’ll usually have to make a cut to end the first row either around an outlet or where the pattern ends.
Cut tile to fit
To make cuts, you’ll need a tile saw, which can be rented from a home improvement center.
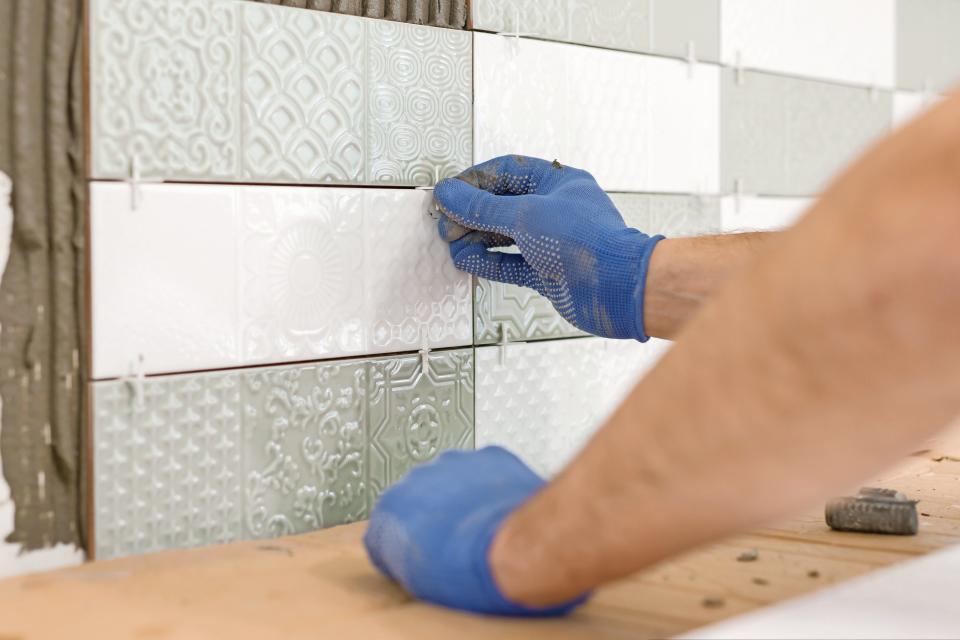
Alternatively, you can rent a manual tile cutter, but saws tend to be faster. You might also need hand nippers to trim pieces to fit or to cut smaller mosaic tiles.
Mark the tile in the first row that needs to be cut with a wax pencil because the water on a tile saw will ruin a pencil line. Take your time and cut the tile, then add it to the end of the first row. Now go back to the centerline and start the second row the same way. Every so often, step away and take a look at the backsplash to ensure that the grout lines are straight.
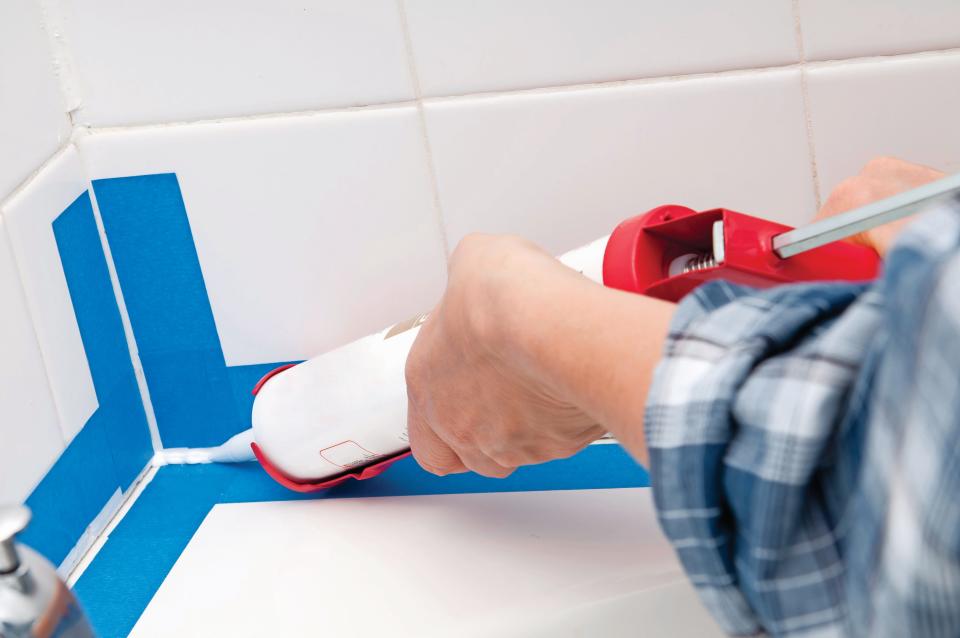
Grout and caulk
When you pick a grout color, you’ll want to make sure you buy a matching caulk. Typically, the manufacturers who make single-component grouts also offer a color-matched silicone caulk. Experts say newer premixed single component grouts are better because they are ready to use and don’t require mixing messy batches of traditional grout.
Scoop the grout out of the tub and force it into the joints between the tile with a rubber float. After about 30 minutes, the tile will haze over. Then you can wipe the surface clean with water and a sponge. You might have to wipe and wash the backsplash more than once.
Once the backsplash is grouted, use a utility knife to pick out any grout that has made its way into the joint between the countertop and the backsplash and in corners where walls meet.
Using a caulk gun, force a bead of silicone into the gap and smooth it over with your finger.

This article originally appeared on USA TODAY: DIY backsplash is a budget-friendly project
