Pimoroni PicoVision Review: Two RP2040 Chips, Retro Video
Pimoroni’s latest product, the $32 PicoVision is a little different than its previous products, and it has history to thank for that. If you are old enough to remember the 1980s bedroom coding scene then you will be aware of the demoscene.
The demoscene is where coders, musicians and artists meet to create demos that push the boundaries of their hardware. The scene was largely moved onwards by rival groups producing “cracktros”, cracks for pirated software that launched before the game / application. The groups would then use their knowledge to make elaborate demos, and then this would lead to many demoparty competitions across the world, Revision is an example. We can see modern demos and some classics via the pouet.net website.
PicoVision Hardware Specifications
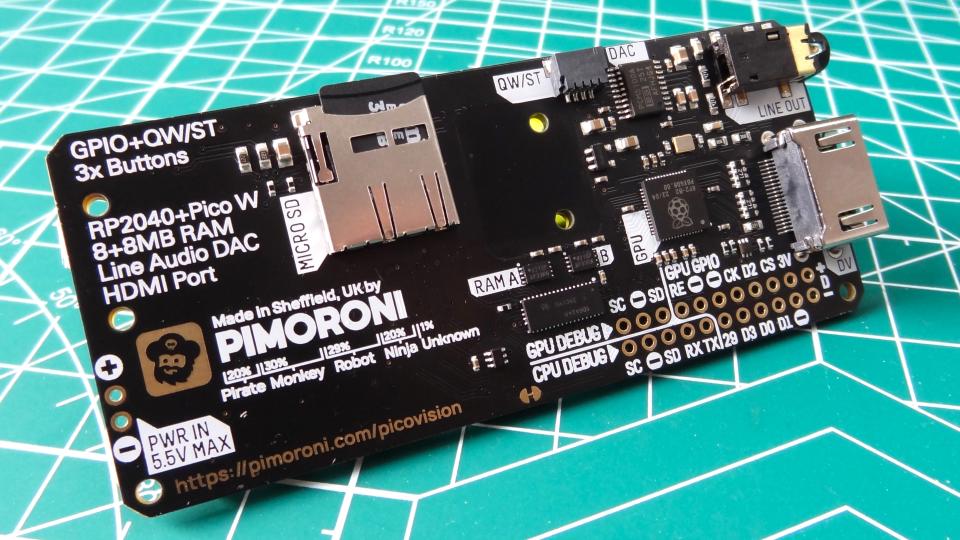
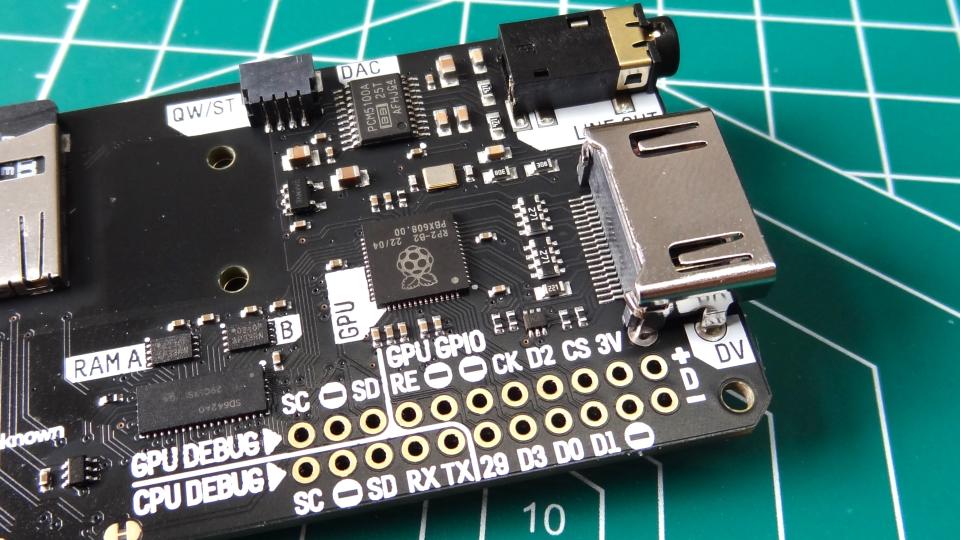
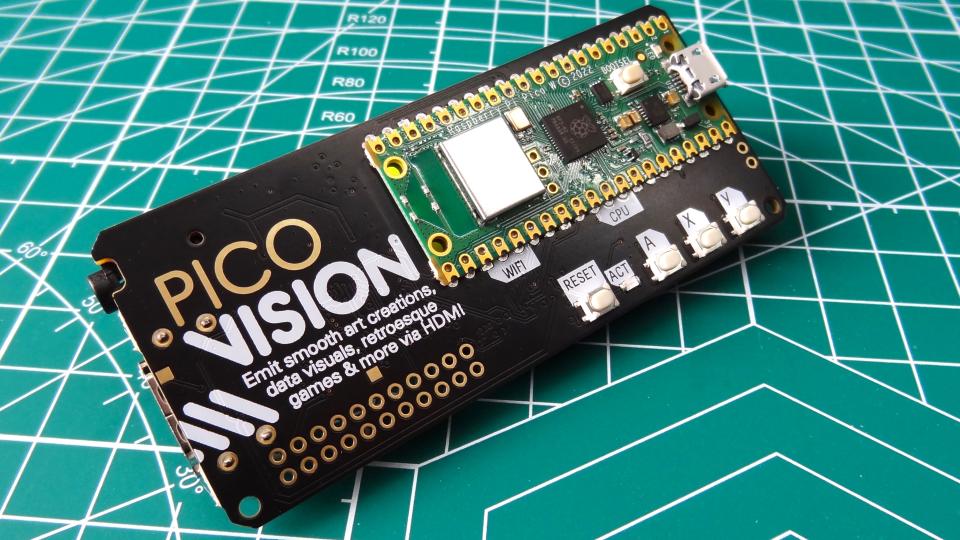
PicoVision has something unique in the Raspberry Pi Pico world, it has two RP2040 SoCs. The first RP2040 is part of the onboard Raspberry Pi Pico W. This RP2040 is the CPU and provides Wi-Fi access. The second RP2040 is on the reverse and it works as the GPU. This GPU won’t play Cyberpunk 2077, but it will output your project code to the onboard HDMI port.
Our review unit came pre-flashed with the latest Pimoroni MicroPython release. Pimoroni enhances the existing MicroPython release with modules and packages for its products. In this case MicroPython has a module, picovision, for creating graphics and sprites using PicoVision.
This module is based upon its PicoGrpahics module which produces graphics for a range of devices, from Inky Frame to Tufty 2040. PicoGraphics abstracts the complexities of producing graphics and that lowers the barrier for anyone wishing to tinker with graphics on a microcontroller.
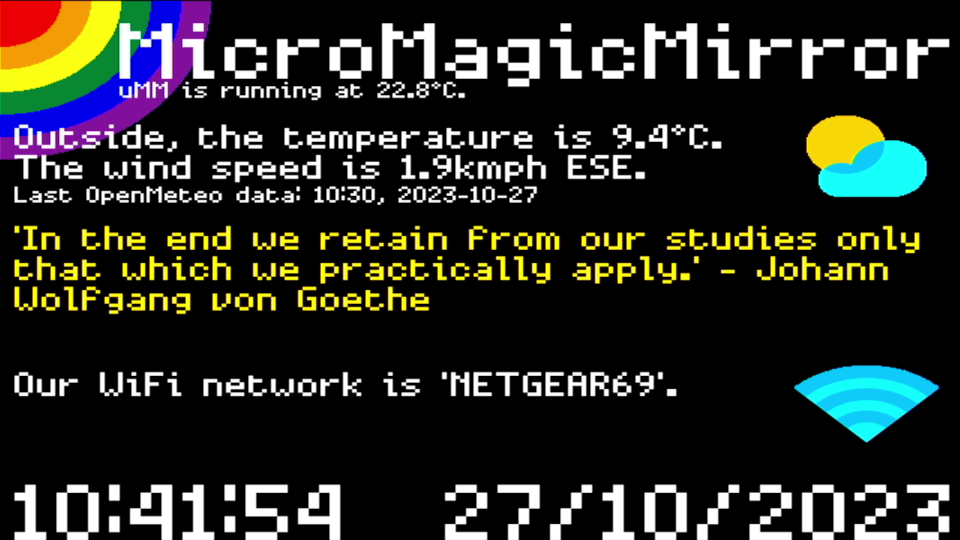
There are two versions of the Pimoroni MicroPython release. First is a version for traditional 4:3 displays and another for widescreen. If you are going for the truly authentic retro look then the former is preferred. But PicoVision isn’t just about retro projects, with it we can produce digital signage, magic mirrors and information portals for modern life.
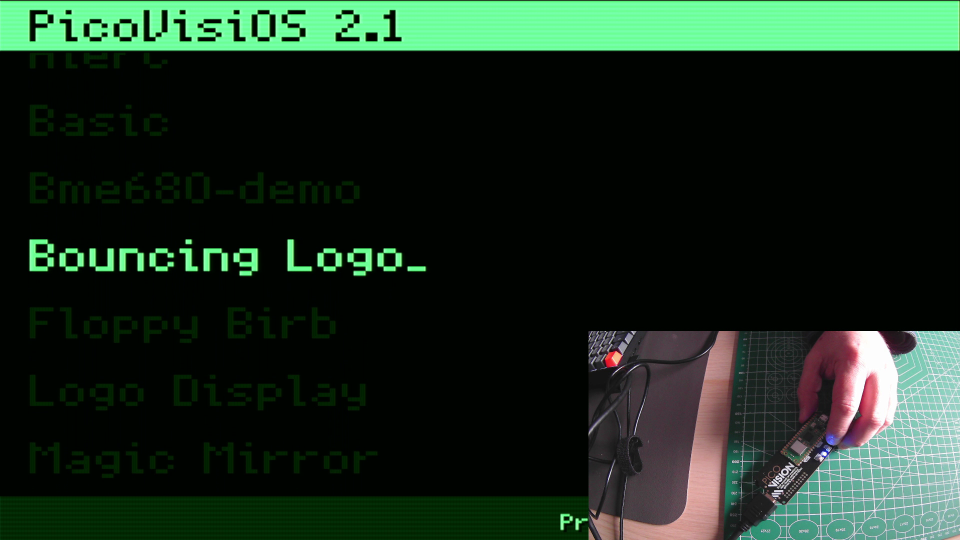
We tested PicoVision using the pre-installed MicroPython. Powering on the board we saw a green screen menu appear on our display. Using the A and X buttons we navigated the menu and selected the app using Y. Pimoroni includes a number of demos to show off PicoVision’s capabilities. From simple text on a screen to parallax scrolling (layers scrolling at different speeds) and even your own Star Trek inspired alert system.
Producing Graphics, Text and Sound


The MicroPython module makes it very easy to shift pixels on the screen. We followed the basic “Hello World” example and soon had text on the screen. We then wrote a simple loop to update the text every five seconds, proving that we could clear and update the screen.
After that we wanted to produce a short animation of the Tom’s Hardware hammer and logo. For this we had two PNG files and luckily we can load a PNG file into RAM and use it directly in the code. Our simple animation merely swapped the images after a short delay but it was enough to give us ideas for future projects.
If you want sound then you either have to start hacking the code to output from the I2S pins to the DV output, or just connect a speaker via the 3.5mm audio jack. The PCM5100A DAC produces clear audio. From beeps to tunes, we can produce good quality audio using the picosynth MicroPython module.
Looking through the community projects in the Github repository, we can see that the ubiquitous Bad Apple demo is present, as is a fully working game of Doom. Phil Howard has also created a “PicoVision-Micro-Computer” demo which recreates an 80s user interface and enables us to connect a keyboard and mouse for some retro coding. All of these projects are powered by C instead of MicroPython. We need the extra RAM and speed to make the most of them.

This is where we have our only gripe with the hardware, and it is unavoidable. To see the output of our work we need an external screen. It may sound silly but it could be an issue for makers with just a single monitor.
Our workaround was to use an HDMI to USB capture stick with OBS. This meant that we could have the output on the screen, right next to the Thonny code editor. It wasn’t perfect, and sometimes OBS would crash, but 80% of the time it worked fine.
PicoVision and the GPIO
PicoVision is all about creating visual and audio projects but that doesn’t mean we can’t have some fun with the GPIO. We have some unsoldered GPIO breakouts on the board. These provide access to I2C, digital IO, power and UART.
We have access to the programmable IO (PIO) pins but these also look to be part of the CPU debug, so perhaps only tinker with these if you know what you are doing. We originally didn't spot any analog inputs, but Chris Parrott from Pimoroni pointed out that GP29, one of the GPU debug pins is also ADC 3 and it is user accessible.
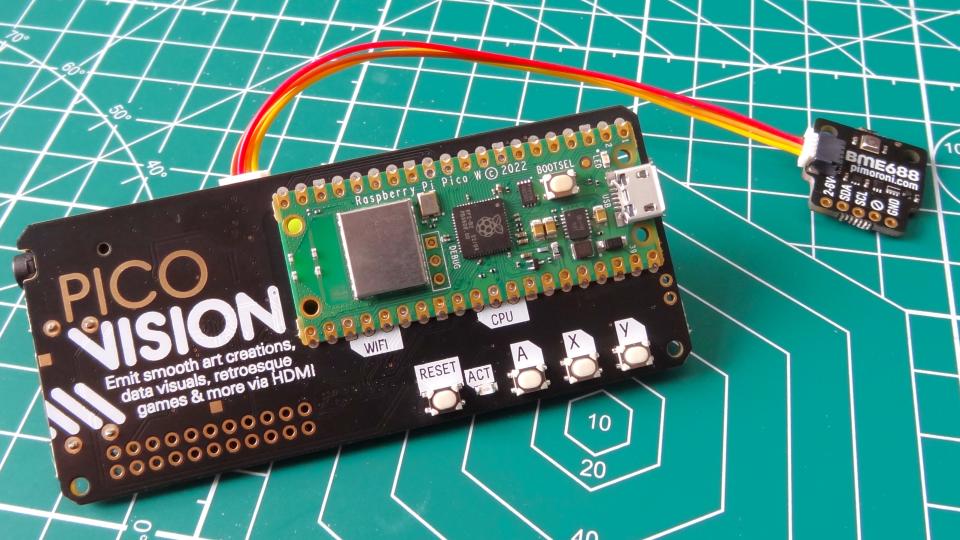
The easiest way to add GPIO to your PicoVision projects is via the QW/ST connector. This is Pimoroni’s name for a Stemma QT / Qwiic / Maker Port connector and it enables fast and easy connection to a plethora of sensors.
We connected a BME688 temperature sensor via QW/ST and with just a few lines of code we had live temperature data on our display.
Who is PicoVision For?
PicoVision is aimed squarely at the retro community. Those of us that spent far too many hours writing BASIC code, or even Python code. We want to produce retro based animations and demos using the Raspberry Pi Pico.
We have to remember that in the 8-bit computing era, we used machines with far less processing power and much less RAM. If you are an artist looking to integrate video and sensors into a piece, then PicoVision is for you. If you want to visualize data using low power kit, PicoVision has the power and simplicity to do that.
Bottom Line
PicoVision offers something for everyone. Old school coders will love pushing the hardware to its limits. Artists will love the simplicity of embedding the tech in their projects. Makers will enjoy merging the physical world with the visuals.
You can do some of this with a standard Raspberry Pi Pico setup, but with PicoVision it gets a lot easier.
