Using the Basilisk II emulator on macOS

The Basilisk II emulator can be used to run old versions of Mac OS 8 and System 7 on a modern Mac. Here's how to get started using it.
Before macOS and OS X, there was Mac OS 9, and before that were its precursors: Mac OS 8, and System 7.x.
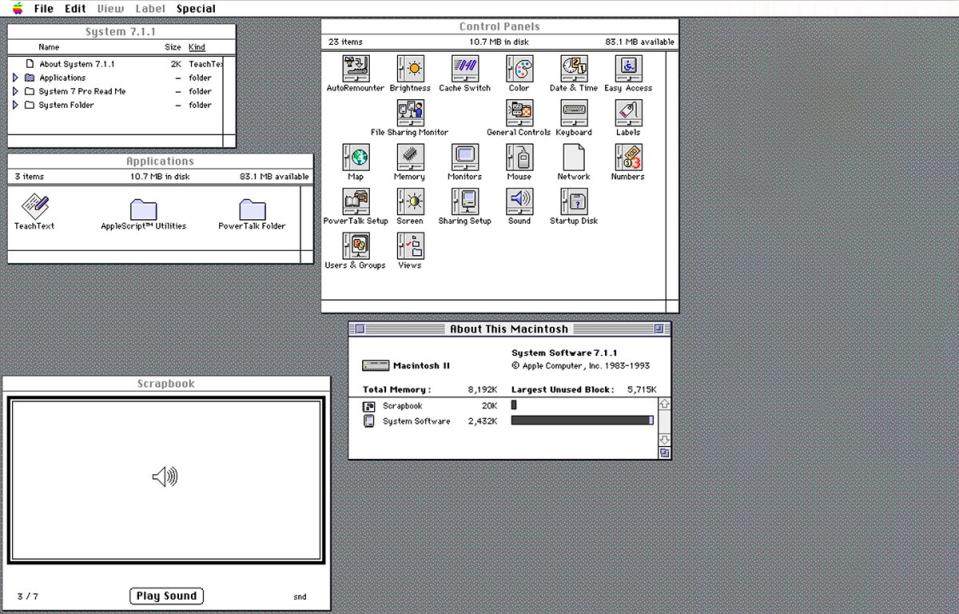
System 7 was released in 1991 and was the first version of Mac OS to feature color. Prior to that, the Mac was black and white only.
Early Macs used a CPU from Motorola called the 68000, better known simply as the 68K.
Emulating Mac OS 8 and System 7
Today there are a number of emulators you can run on your modern Mac to emulate Mac OS 8 and System 7 running on a vintage 68K Mac. Among these are Basilisk II, Sheepshaver, macintosh.js, and others.
There are also many online Mac OS 9 emulators.
In this article, we'll cover Basilisk II written by Christian Bauer.
Getting Basilisk II
To download Basilisk II, head over to its page which has links to acquire the executable. There is also a GitHub repo which contains source code written in C++.
Note that the download links are on the Basilisk II forums and can be a bit confusing. The most recent post from the forums page as of this writing reads:
"SDL2 port, 10 August 2023, universal (x86_64 and arm64) from github.com/kanjitalk755/macemu source Universal, will run natively on both Intel and Apple Silicon Recommended for macOS 10.13 (High Sierra) through 13 (Ventura) Download: https://www.emaculation.com/basilisk/Ba ... 230810.zip"
SDL2 is the Simple DirectMedia Layer - a code library framework that handles graphics, sound, and user input. You can install SDL2 from its website as a macOS framework in /Library/Frameworks, but Basilisk II has a copy of the framework built in.
Basilisk II has been ported to run on macOS, older versions of Windows, most X11-based versions of Unix, and some older vintage operating systems.
Once Basilisk II has been downloaded, you'll need to do some configuration first. Along with Basilisk II you'll also need copies of original Macintosh ROMs from a 512K or 1MB classic Mac, Mac II, and the original version of Mac OS you wish to run (System 7.1, 7.5.3, Mac OS 8, or 8.1).
Also from the forums page:
"For a new BasiliskII setup, a BasiliskIIGUI application and a keycodes file are needed"
Keycode files are only needed if you're not using the US-English keyboard.
To get the original Mac ROM files you'll need to own one of the mentioned original Macs and dump its ROM to a file. For copyright reasons, we won't get into how to do that here.
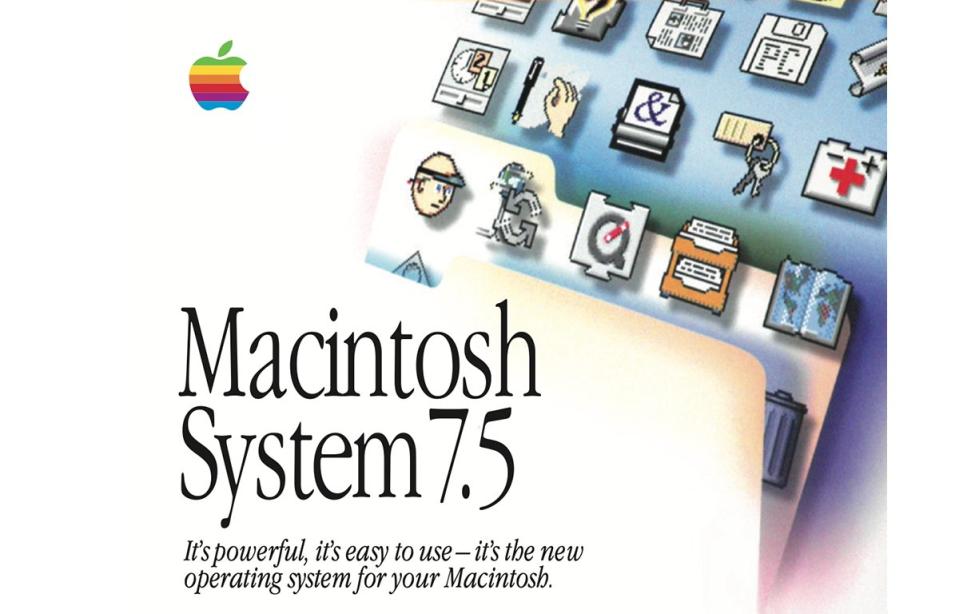
Apple does provide a free download of MacOS 7.5.3, one of the last commercially released versions of System 7, online.
The original Macs had much of their OS and APIs in hardware in ROMs on the motherboards. The OS could be extended later by installing software but all the old Mac OS versions and apps made calls to the ROM APIs to standardize many software functions.
Be sure to read the Basilisk II README file for additional details before you continue. You'll also want to read the Technical Manual which is linked at the top of the main Basilisk II page.
The Basilisk II GitHub page also has a Mac OS 9 emulator called SheepShaver which emulates later PowerPC CPU-based Macs. Mac OS 9.0, 9.1, and 9.2.1 which ran on PowerPC Macs were the final versions of Apple's classic OS before Apple released Mac OS X in 2000.
Note that when Apple released new revolutionary Macs in 1998 (iMac, PowerMac G3, and the first iBook), it switched to a new ROM format called "NewWorld" ROMs. Depending on whether you want to emulate a pre-1998 or post-1998 Mac, you'll need either "Old-world" or "New-World" ROMs.
Macs from 1998 or later also switched to new firmware called Open Firmware. You can boot any 1998 or later classic PowerPC-based Mac into Open Firmware by holding down Command-Option-O-F on the Mac's keyboard after restarting.
Installing Basilisk II
Basilisk II emulates either a Macintosh Classic, Classic II (the last of the black and white "compact Macs"), or a Macintosh II running MacOS 7.x, 8.0, or 8.1, or the successor to the Mac II line called Quadra. The Macintosh II was Apple's first color Macintosh and came in a large, wide desktop form factor without a built-in display.
The original Mac II models were, in order:
Mac II
Mac IIcx
Mac IIci
Mac IIvx
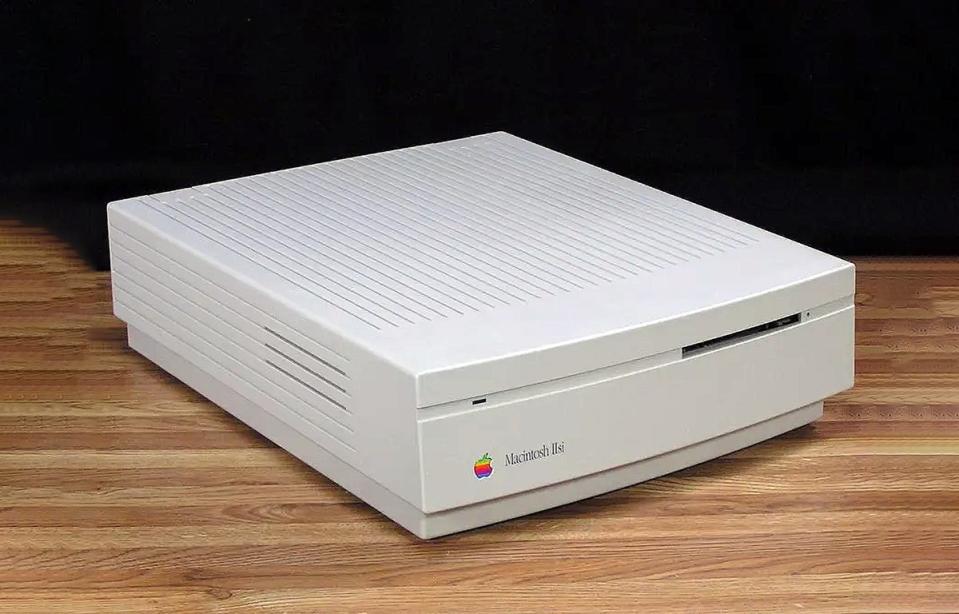
Mac IIsi
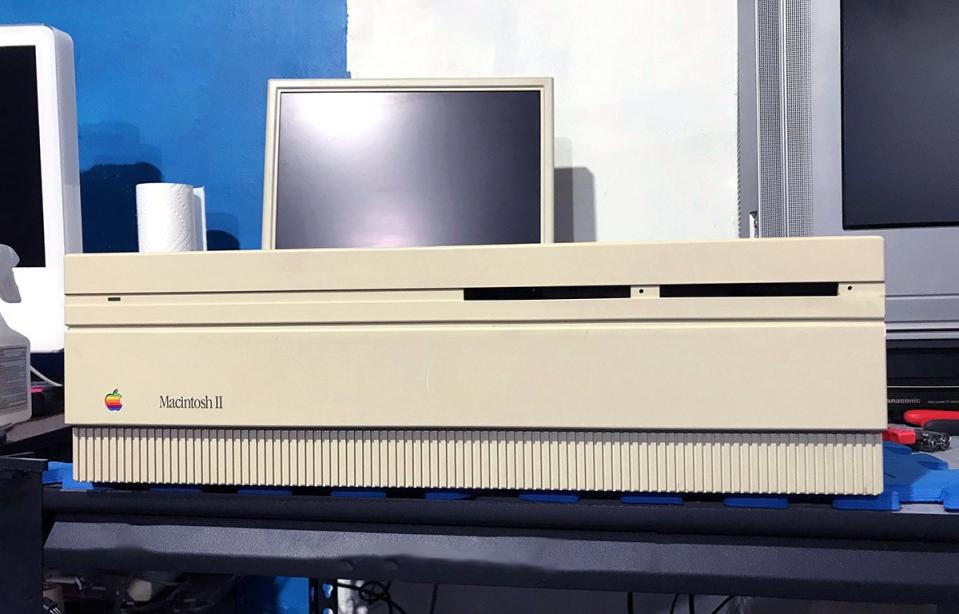
The IIcx and IIvx were short-lived models. By far the most popular of the Mac II models was the Mac Iici which was much more compact and easier to deal with than the original Mac II.
Later Apple replaced the Mac II line with the new Quadra line because it was based on the next evolution of the 68000 - the 68040. These models included the Quadra 700 which looked like the IIci, and two huge desktop tower models: the 900 and 950.
The 700 became one of Apple's most popular models.
The IIsi was a low-end, more compact version of the Mac IIci with more limited features and only one expansion slot.
For Basilisk II installation instructions, you'll need to clone the macemu GitHub repository on Christian's GitHub page, dive into the /macemu/BasiliskII/ folder, and read the file INSTALL.
If you are running on a non-macOS UNIX system, you will need to compile Basilisk II from source on that platform, which is detailed in the INSTALL file.
As mentioned in the INSTALL file:
"The ROM file has to be named "ROM" and put in the same directory as the Basilisk II executable but you can specify a different location for the ROM file with the "rom" option in the preferences file (or with the preferences GUI)."
If you try to run Basilisk II without the ROM file, nothing happens.
For the most recent, complete setup info, see the critical page Setting up System 7.5.3 with BasiliskII for OSX/macOS.
According to that page, you'll need to create folder in your user's home folder named "BasiliskII", and put the app, any keyboard keycode files, the ROM file, and other mentioned associated files into it.
You'll also need the mentioned Basilisk II GUI beta application which is used to set up and configure the emulator.
Note that the GUI config app can only be downloaded from another linked forum post. Current version as of this writing is 0.20.
There is also another utility mentioned from a third party called "Basilisk II Disk Image Chooser" which helps select and configure disk images.
Basilisk II GUI has a popup menu for setting the Mac model, but currently only two models are enabled from the popup: Mac Iici (System 7.x) and Quadra 900 (for Mac OS 8.x).
The Basilisk II GUI also has a Browse button for selecting the ROM file using a standard macOS file Open pane, which allows you to choose a ROM file located in another location.
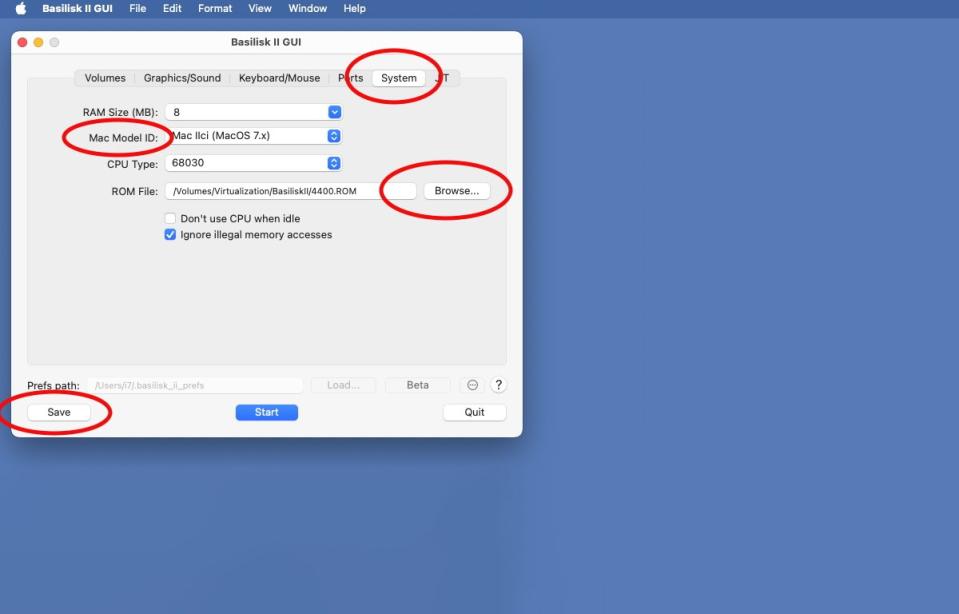
The first time you run Basilisk II, it will create an invisible prefs file at the root of your user folder named ".basilisk_ii_prefs". Although this file doesn't have any file extension, it's a plain text file which you can open with any text editor to change some of Basilisk II's settings.
Some important values in the prefs file are:
displaycolordepth
ramsize
fpu (Floating point unit)
nosound
rom
disk
The 'rom' value is critical - it points to the Mac ROM file to use. But we'll get to that in a moment below.
You can also set or add classic 1.44MB floppy disk drives to the prefs file from the GUI or by adding "floppy" keys with paths to the floppy diskette images you want to use.
Original Macs used standard 3.5-inch floppy diskettes designed by Sony which were in a sealed plastic shell with a sliding metal door to expose the disk media when a diskette was inserted into a floppy disk drive. You can make images of these disks and load them into Basilisk II.
They were called "floppies" because the disk media itself was just a thin plastic film with a magnetic recording surface bonded to it. If you removed the outer hard plastic shell, the disk would "flop" over if you picked it up.
You will also need to set a disk (volume) to boot from. This is different than setting the ROM file.
The ROM file contains only the Mac OS ROM code. You'll still need a bootable disk containing the actual Mac OS operating system in order to boot the emulator.
If you haven't set both, the emulator won't start. Back in Basilisk II GUI, you can set up your disk volumes in the Volumes tab:
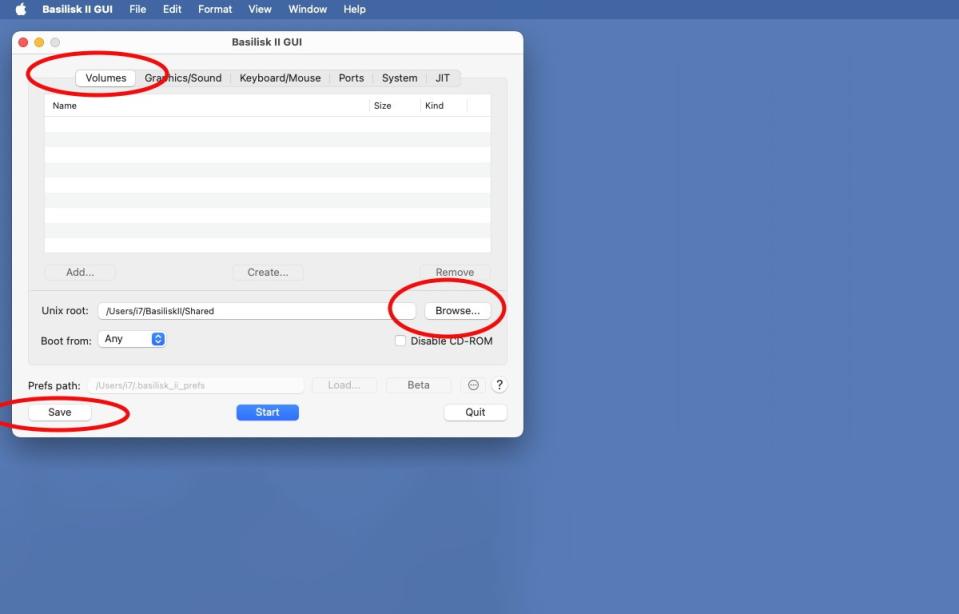
If you're not sure what to add here, add the DiskTools_MacOS8.image as stated on the forums setup page.
A better way is to run the third-party Basilisk II Disk Image Chooser app. This app detects if you don't have any startup disk set in your emulator configuration - and if you don't it will prompt you with options to set one up:
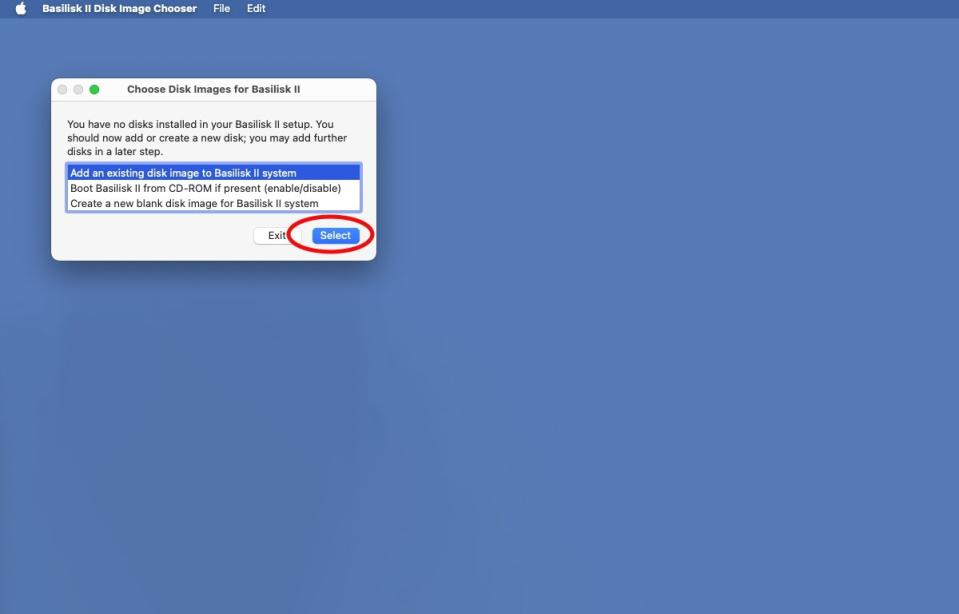
You may want to quit Basilisk II GUI first before running Basilisk II Disk Image Chooser, then restart it after you've set a startup disk.
If you click the Select button in Basilisk II Disk Image Chooser, you can choose a disk image to use and the utility will set it for you in the emulator's prefs file.
Once you try to exit Basilisk II Disk Image Chooser, it will ask you if you want to write the prefs file. If you do, it will then prompt whether you want to launch Basilisk II, return to the main menu, or exit.
Select Launch Basilisk II to start the emulator, or Exit to quit Basilisk II Disk Image Chooser so you can go back to Basilisk II GUI to finish configuration.
If you reopen the .basilisk_ii_prefs file, you'll note several entries have been added. Most notably the 'rom' and 'disk' entries which point to the ROM file and startup disk to use when the emulator starts.
For example:
rom /Volumes/Virtualization/BasiliskII/9779D2C4 - MacII (800k v2).ROM disk /Volumes/Virtualization/BasiliskII/DiskTools_MacOS8.image
Be sure the startup disk image file you select matches which Mac model (ROM) you've chosen to use. Some older Macs can't run newer versions of the Mac OS, and vice versa.
If you reopen Basilisk II GUI, under the Volumes tab you'll now see the startup disk image Basilisk II Disk Image Chooser set for you:
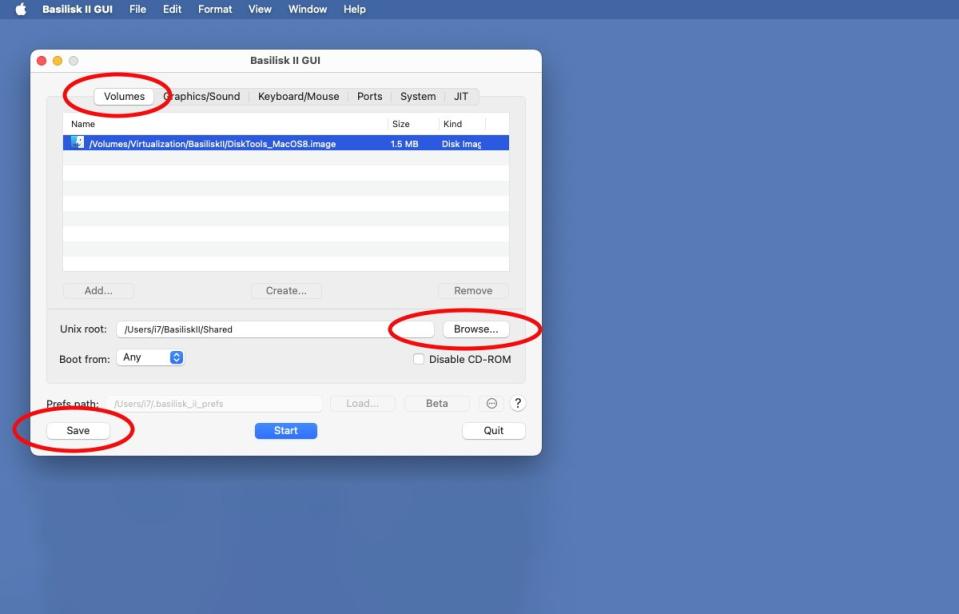
Shared files
As the instructions note, the UNIX root under the Volumes tab in Basilisk II GUI can be set to point to a shared folder on your modern Mac's filesystem - any files you put in the UNIX root folder will appear on the emulated Mac OS desktop as a "UNIX" disk volume.
You can copy files from your modern Mac to the emulated Mac's desktop by placing them in this folder. Note you need to restart the emulator for any changes to be noticed.
Starting the emulator
Once you're satisfied with all the settings in Basilisk II GUI, click the Save button, then click Start. This starts the emulator from the startup disk you set.
When you're done using Basilisk II and want to quit the emulator, select the Shut Down menu item from the Finder's Special menu in the old (emulated) Mac OS you are running.
Unlike in modern macOS, the Shut Down menu item is on the right side of the menu bar in the old Mac OS under the Special menu.
While Basilisk II is a bit confusing to set up and configure at first, it's a nice piece of software. Once you get everything installed, it's easy to use.
Being able to run both System 7.5.3 and Mac OS 8 on modern Macs opens your computer up to a huge library of vintage software used on the Mac in decades past.
